Read this in other languages:
 English,
  日本語,
日本語,  Français.
Section 1 - Creating your Playbook
The win_updates module is used to either check for or to install
Windows Updates. The module utilizes the built in Windows Update service
to function. This means that you still will need a backend system like
WSUS or the online Windows Update Servers to download updates from. If
your server’s Windows Update configuration is set to automatically
download but not install, you can also utilize the module to stage
updates by telling it to search for updates. We also have the ability
to whitelist or blacklist updates. For example we could tell it to only
install one particular security update instead of every update
available.
To begin, we are going to create a new playbook. We will be repeating the steps you performed in the earlier exercises.
Step 1
Within Visual Studio Code, we will now create a new directory in your git repository and create a new playbook file.
In the Explorer accordion you should have a student# section where you previously made iis_basic.
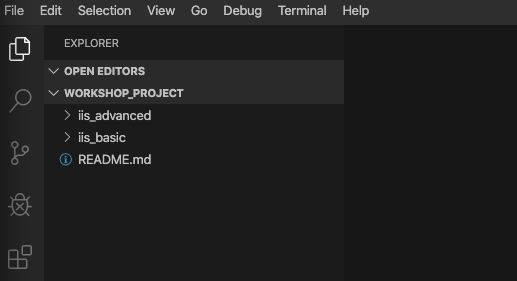
Hover over the WORKSHOP_PROJECT section and click the New Folder button. Type win_updates and hit enter.
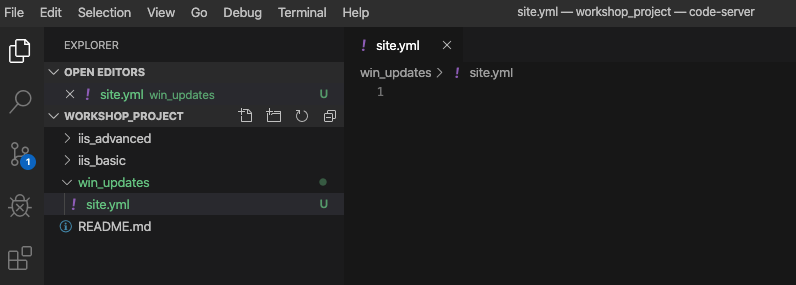
Now right-click the win_updates folder and click the New File button. Type site.yml and hit enter.
You should now have an editor open in the right pane that can be used for creating your playbook.
Section 2: Write your Playbook
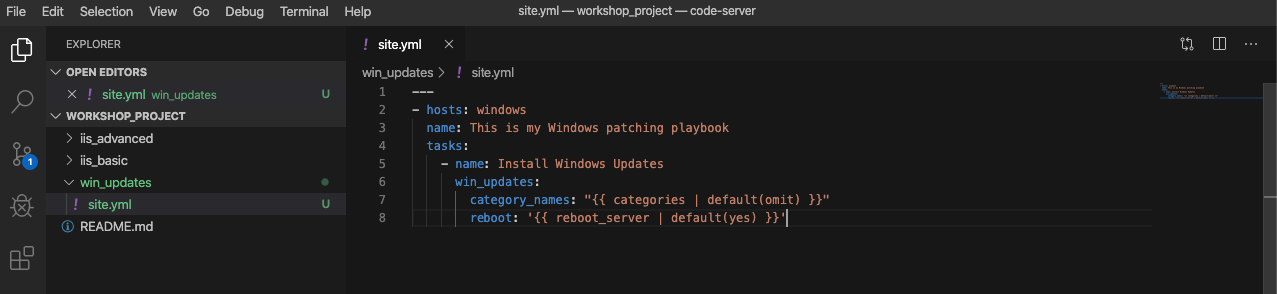
Edit your site.yml and add a play definition and some tasks to your playbook. This will cover a very basic playbook for installing Windows Updates. Typically you would have even more tasks to accomplish the entire update process. This might entail creating service tickets, creating snapshots, or disabling monitoring.
---
- hosts: windows
  name: This is my Windows patching playbook
  tasks:
    - name: Install Windows Updates
      win_updates:
        category_names: "{{ categories | default(omit) }}"
        reboot: '{{ reboot_server | default(true) }}'
Note
What are we doing?
win_updates:This module is used for checking or installing updates. We tell it to only install updates from specific categories using a variable.rebootattribute will automatically reboot the remote host if it is required and continue to install updates after the reboot. We will also use a survey variable to stop us from rebooting even if needed. If the reboot_server value is not specified we will set the reboot attribute to true.
Section 3: Save and Commit
Your playbook is done! But remember we still need to commit the changes to source code control.
Click File → Save All to save the files you’ve written
Click the Source Code icon (1), type in a commit message such as Adding windows update playbook (2), and click the check box above (3).
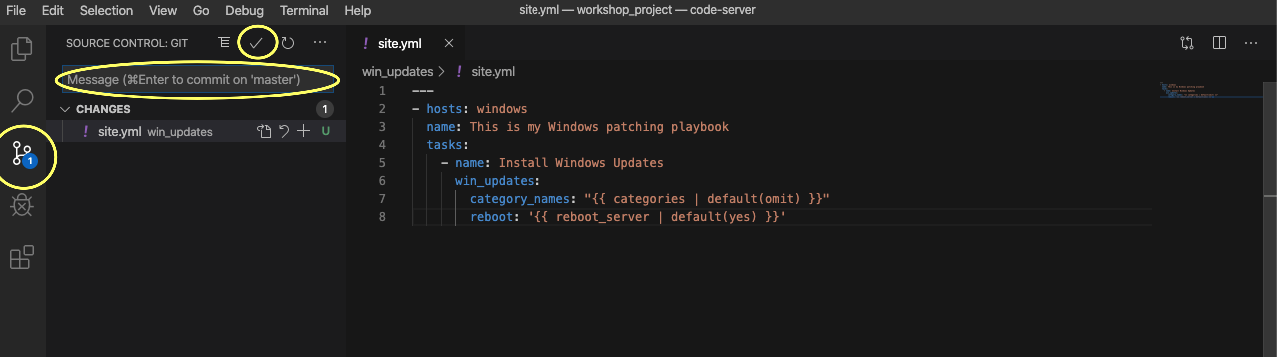
Sync to gitlab by clicking the arrows on the lower left blue bar.
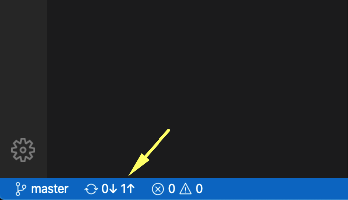
It should take 5-30 seconds to finish the commit. The blue bar should stop rotating and indicate 0 problems…
Section 4: Create your Job Template
Now, back in Controller, you will need to resync your Project so that the new files show up.
Next we need to create a new Job Template to run this playbook. So go to
Template, click Add and select Job Template to create a new job
template.
Step 1
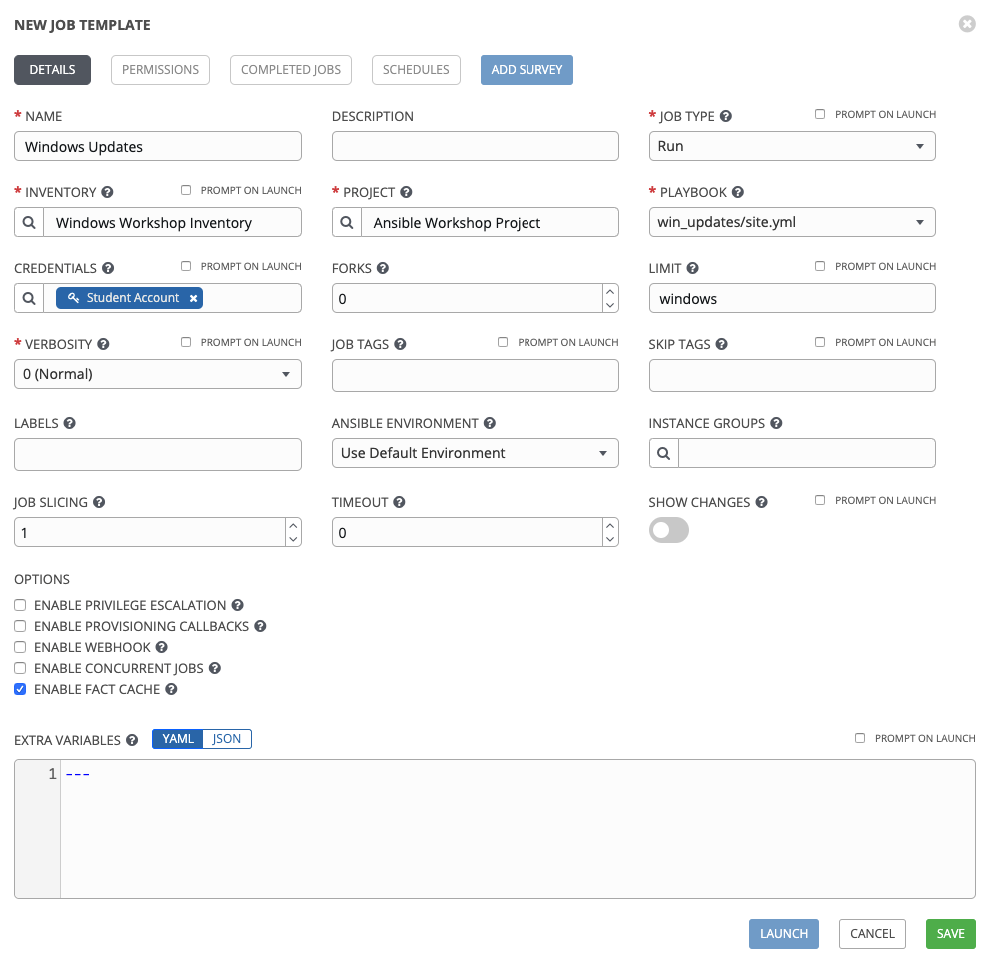
Complete the form using the following values
| Key | Value | Note |
|---|---|---|
| NAME | Windows Updates | |
| DESCRIPTION | ||
| JOB TYPE | Run | |
| INVENTORY | Workshop Inventory | |
| PROJECT | Ansible Workshop Project | |
| Playbook | win_updates/site.yml |
|
| MACHINE CREDENTIAL | Student Account | |
| LIMIT | windows | |
| OPTIONS | [*] ENABLE FACT CACHE |
Step 2
Click SAVE  and then select ADD SURVEY

Step 3
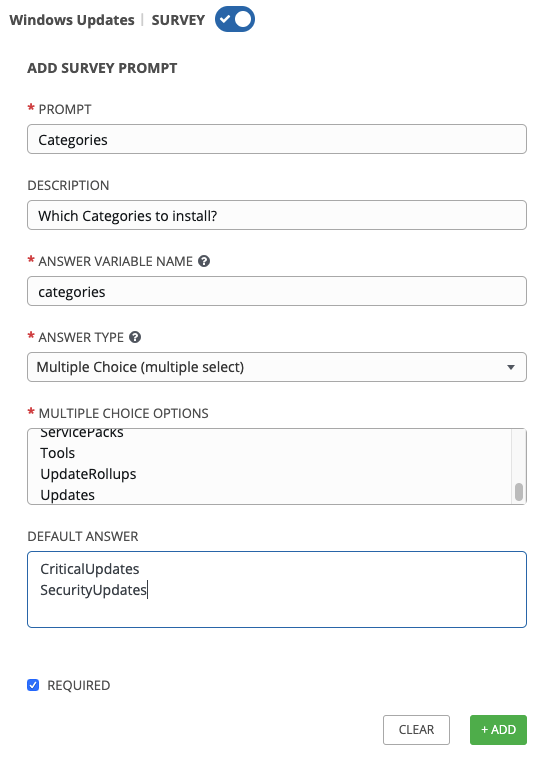
Complete the survey form with following values
| Key | Value | Note |
|---|---|---|
| PROMPT | Categories | |
| DESCRIPTION | Which Categories to install? | |
| ANSWER VARIABLE NAME | categories | |
| ANSWER TYPE | Multiple Choice (multiple select) | There’s also a single selection option |
| MULTIPLE CHOICE OPTIONS | Application Connectors CriticalUpdates DefinitionUpdates DeveloperKits FeaturePacks Guidance SecurityUpdates ServicePacks Tools UpdateRollups Updates |
|
| DEFAULT ANSWER | CriticalUpdates SecurityUpdates |
|
| REQUIRED | Selected | |
Once complete, click the ADD  button. You will
see your new field off to the right. Now add another field by filling
out the form on the left again.
button. You will
see your new field off to the right. Now add another field by filling
out the form on the left again.
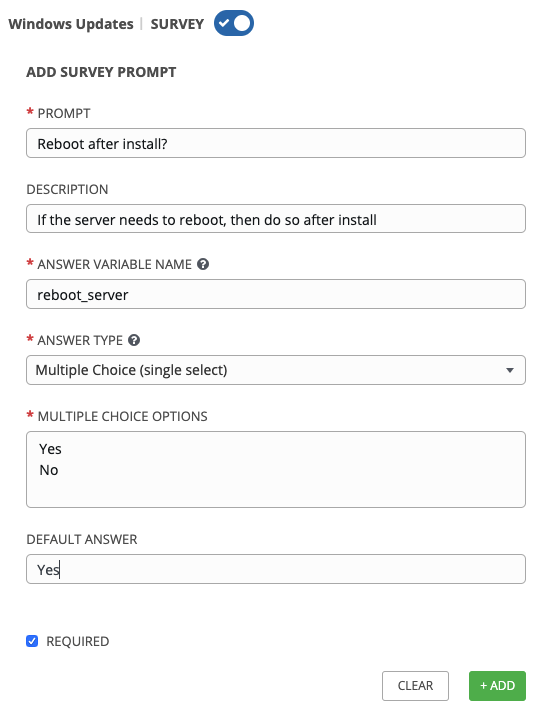
| Key | Value | Note |
|---|---|---|
| PROMPT | Reboot after install? | |
| DESCRIPTION | If the server needs to reboot, then do so after install | |
| ANSWER VARIABLE NAME | reboot_server |
|
| ANSWER TYPE | Multiple Choice (single select) | |
| MULTIPLE CHOICE OPTIONS | Yes No |
|
| DEFAULT ANSWER | Yes | |
| REQUIRED | Selected |
Step 4
Select ADD
Step 5
Select SAVE
Step 6
Back on the main Job Template page, select SAVE
again.
Section 6: Running your new playbook
Now let’s run it and see how it works.
Step 1
Select TEMPLATES
Note
Alternatively, if you haven’t navigated away from the job templates creation page, you can scroll down to see all existing job templates
Step 2
Click the rocketship icon ![]() for the
Windows Updates Job Template.
for the
Windows Updates Job Template.
Step 3
When prompted, enter select the update categories. Answer Yes to the
Reboot after install? prompt and click NEXT.
After the job launches, you should be redirected and can watch the output of the job in realtime.