Exercise - Linux System Roles
Read this in other languages:
 English,
  日本語,
日本語,  Français
Table Contents
Objective
The goal of this exercise is to understand and use pre-existing content in the forms of roles and collections from Automation Hub and Ansible Galaxy.
- Understand and use Linux System Roles and RHEL System Roles Collection
- Use firewall role to configure the firewall
- Use the timesync role to configure NTP from the RHEL System Roles Collection.
- Use a pre-populated Ansible Survey to configure the RHEL web hosts
Guide
Linux System Roles create a consistent user interface to provide settings to a given subsystem that is abstract from any particular implementation. For example, assigning an IP Address to a network interface should be a generic concept separate from any particular implementations such as init networking scripts, NetworkManager, or systemd-networkd.
This exercise will use two Linux System Roles, the timesync and firewall roles.
Step 1 - Examine Ansible Project
In the Ansible Automation Controller UI navigate to Projects then click on the Ansible official demo project:

Take note of the Github repository that was pre-loaded into your Ansible Automation Controller environment:
https://github.com/ansible/product-demos
Step 2 - Examine the Ansible Playbook
Open the repository linked above in your web browser. Navigate to linux/hardening.yml
The full URL is: https://github.com/ansible/product-demos/blob/main/linux/hardening.yml
Take note of these two tasks:
- name: Configure Firewall
  when: harden_firewall | bool
  ansible.builtin.include_role:
    name: linux-system-roles.firewall

- name: Configure Timesync
  when: harden_time | bool
  ansible.builtin.include_role:
    name: redhat.rhel_system_roles.timesync
There are two tasks that include a role and a role from a collection respectively. If you have trouble distinguishing a role that comes directly from Ansible Galaxy versus a role that is in an Ansible Collection this nomenclature should help you:
| Ansible Collection | namespace.collection.role |
| Ansible Role | namespace.role
|
Step 3 - Examine the Linux System Roles
The Ansible Playbooks are simple. They just use the pre-built Ansible Playbooks provided by Ansible Galaxy and Automation Hub. These were pre-installed for this Ansible Workshop.
- firewall system role - by default this installs firewalld, python3-firewall. Optional parameters can be sent such as what service to open:
vars:
  firewall:
    service: 'tftp'
    state: 'disabled'
- timesync system role from the RHEL System Roles Collection - will install NTP or chrony depending on your OS version, configure them, and make sure the system clock for the Linux host is synchronized. Optional parameters can be set to specify specific parameters:
vars:
  timesync_ntp_servers:
    - hostname: foo.example.com
      iburst: yes
    - hostname: bar.example.com
      iburst: yes
    - hostname: baz.example.com
      iburst: yes
Step 4 - Launch the Ansible Job
In the Ansible Automation Controller UI navigate to Templates.
Click on the rocket to launch the SERVER / Hardening job template:

This will launch a survey before starting the job. Fill out the survey:
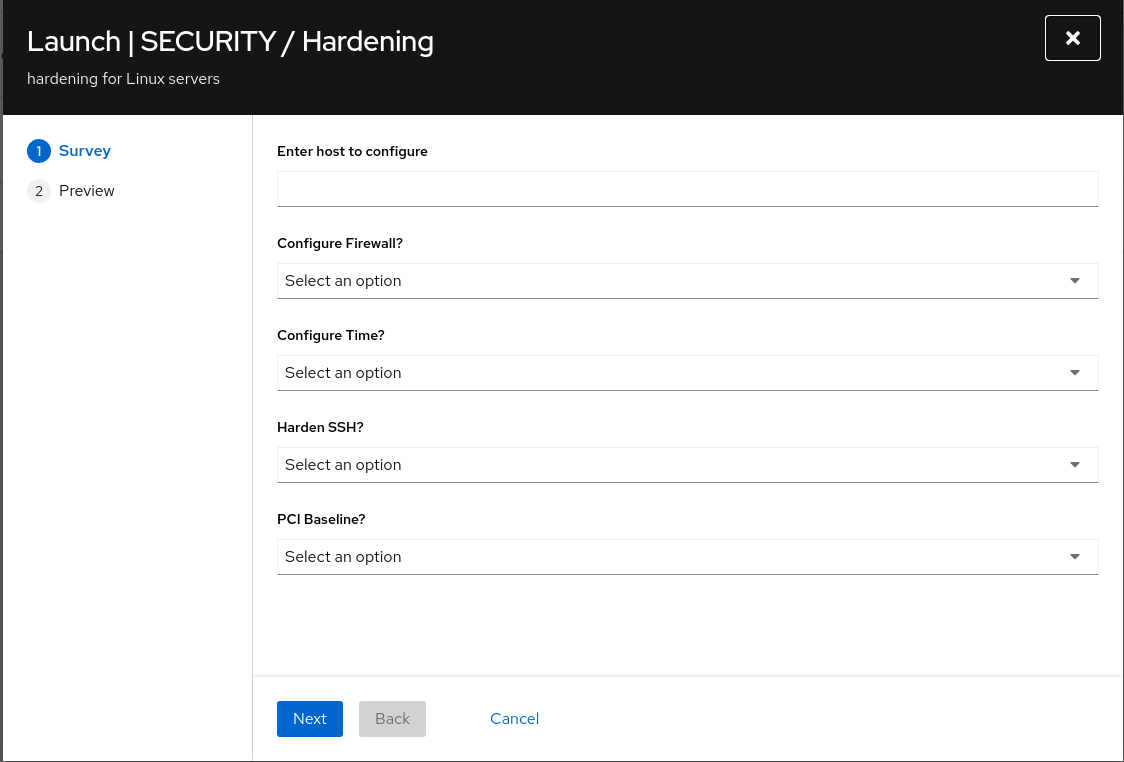
- The CONFIGURE FIREWALL? question will enable the
firewallsystem role. - The CONFIGURE TIME? will enable the
timesyncsystem role. - For the purpose of this exercise set the rest to No
Click the NEXT button:

Review the EXTRA VARIABLES to understand what the survey did. Click the LAUNCH button:

Watch the Job kick off!
Step 5 - Verify the configuration
From the Ansible control node, ssh to the node you configured:
$ ssh node1
For Red Hat Enterprise Linux 8 the timesync system role used chronyd. Check if it is installed, enabled and running with systemctl status command:
$ sudo systemctl status chronyd.service
Here is the full output:
[student@ansible ~]$ sudo systemctl status chronyd.service
● chronyd.service - NTP client/server
   Loaded: loaded (/usr/lib/systemd/system/chronyd.service; enabled; vendor preset: enabled)
   Active: active (running) since Tue 2020-04-21 14:37:14 UTC; 13h ago
     Docs: man:chronyd(8)
           man:chrony.conf(5)
 Main PID: 934 (chronyd)
    Tasks: 1 (limit: 23902)
   Memory: 1.8M
   CGroup: /system.slice/chronyd.service
           └─934 /usr/sbin/chronyd

Apr 21 14:37:14 localhost.localdomain systemd[1]: Starting NTP client/server...
Apr 21 14:37:14 localhost.localdomain chronyd[934]: chronyd version 3.5 starting (+CMDMON +NTP +REFCLOCK +RTC +PRIVDROP +SCFILTER +SIGND +ASYNCDNS +SECHASH +IPV6 +DEBUG)
Apr 21 14:37:14 localhost.localdomain chronyd[934]: Using right/UTC timezone to obtain leap second data
Apr 21 14:37:14 localhost.localdomain systemd[1]: Started NTP client/server.
Apr 21 14:38:12 ip-172-16-47-87.us-east-2.compute.internal chronyd[934]: Selected source 129.250.35.250
Apr 21 14:38:12 ip-172-16-47-87.us-east-2.compute.internal chronyd[934]: System clock TAI offset set to 37 seconds
Here are some other commands that can be used to verify time is working correctly:
# chronyc tracking
# chronyc sources
# chronyc sourcestats
# systemctl status chronyd
# chronyc activity
# timedatectl
For example:
$ timedatectl
               Local time: Wed 2020-04-22 03:52:15 UTC
           Universal time: Wed 2020-04-22 03:52:15 UTC
                 RTC time: Wed 2020-04-22 03:52:15
                Time zone: UTC (UTC, +0000)
System clock synchronized: yes
              NTP service: active
Complete
You have completed lab exercise
Navigation
Previous Exercise
Click here to return to the Ansible for Red Hat Enterprise Linux Workshop