Section 1: ad-hoc commands
Read this in other languages:
 English,
  日本語,
日本語,  Français.
For our first exercise, we are going to run some ad-hoc commands to help you get a feel for how Ansible works. Ansible ad-hoc commands enable you to perform tasks on remote nodes without having to write a playbook. They are very useful when you simply need to do one or two things quickly, to many remote nodes.
Step 1
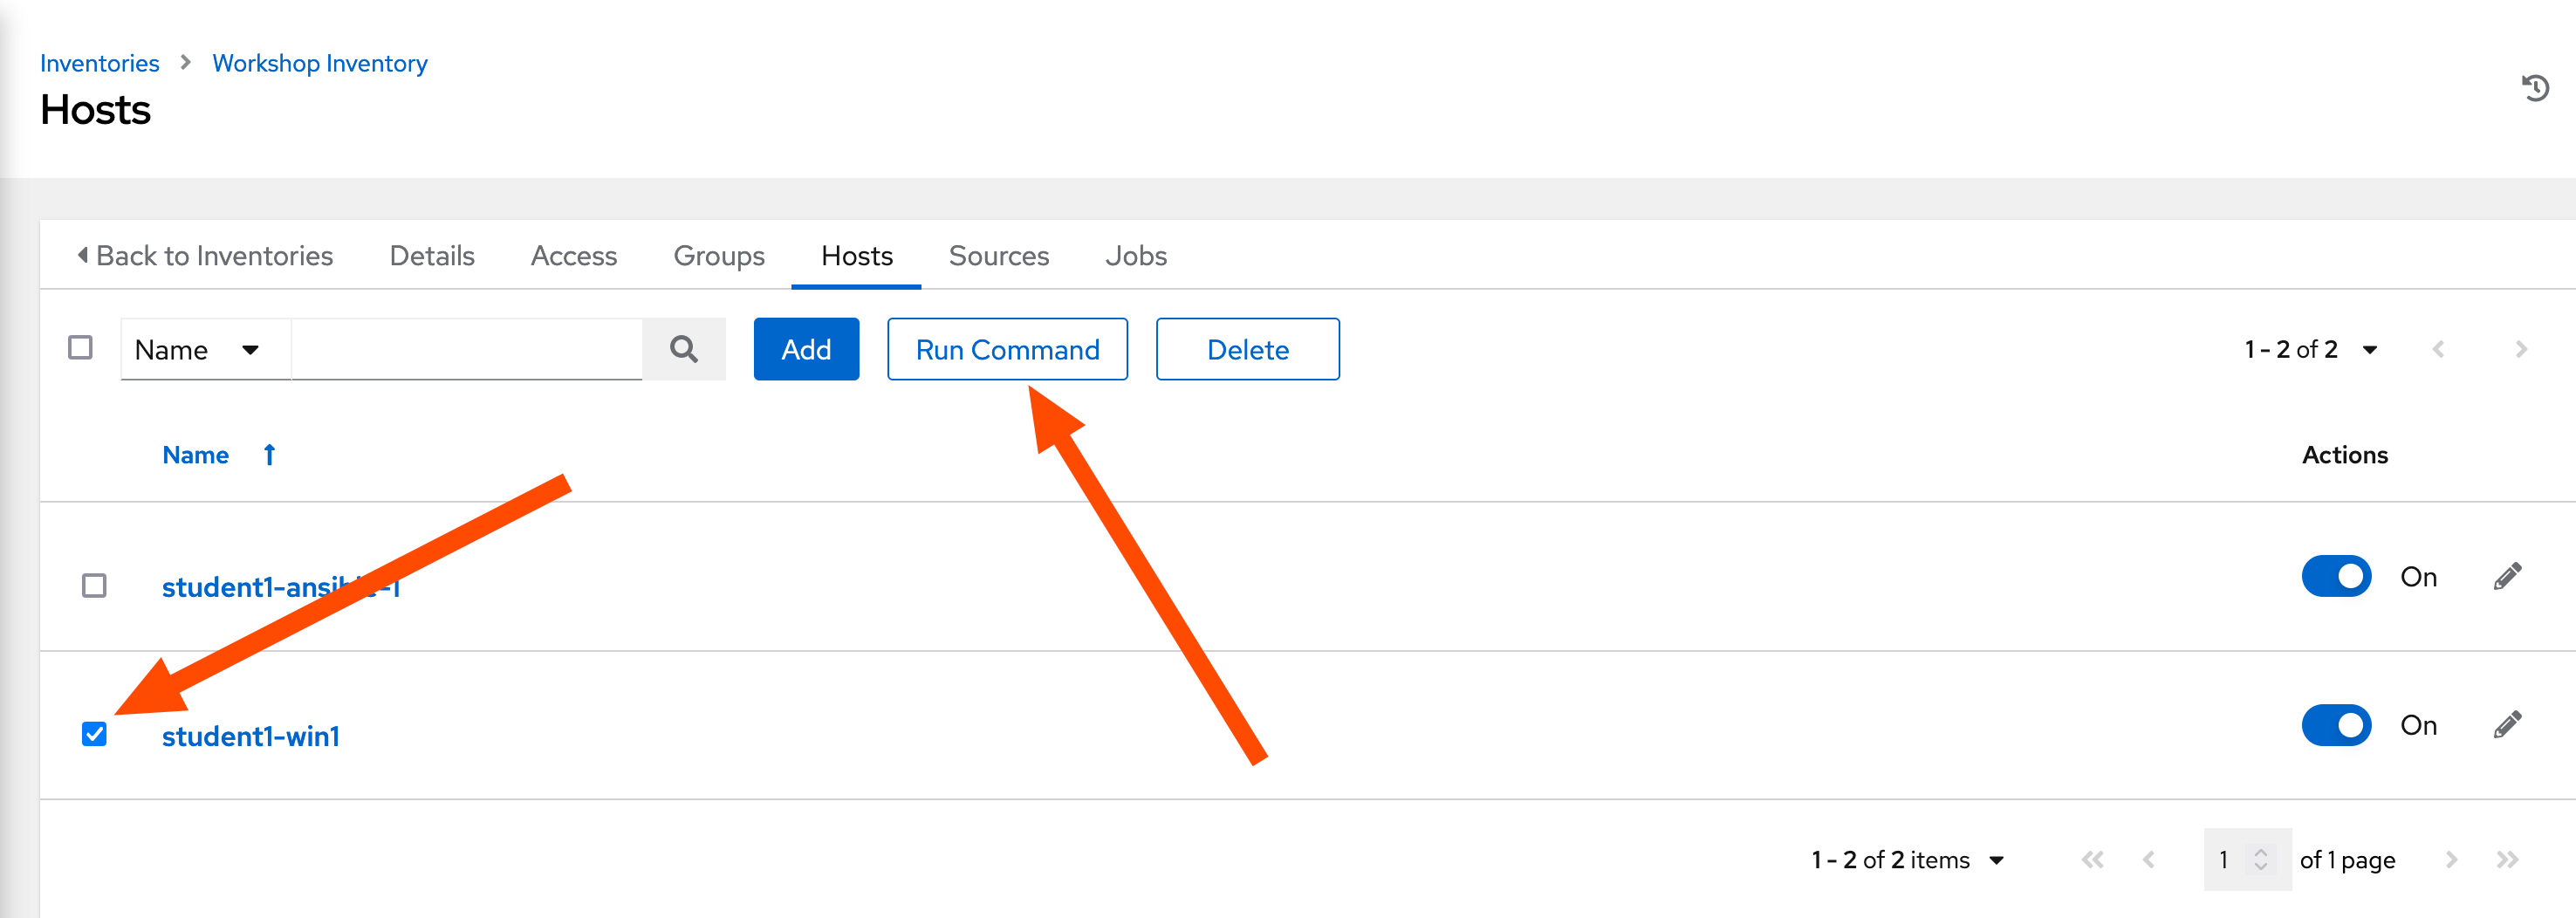
To start, we will need to go to our Inventory. So click Inventories on the left panel, and then click the name of our Inventory Workshop Inventory. Now that you are on the Inventory Details page, we will need to go select our Host. So click HOSTS.
Next to each host is a checkbox. Check the box next to each host you want to run an ad-hoc Command on. Select the Run Command button.
This will pop up the Execute Command window. From here is where we can run a single task against our hosts.
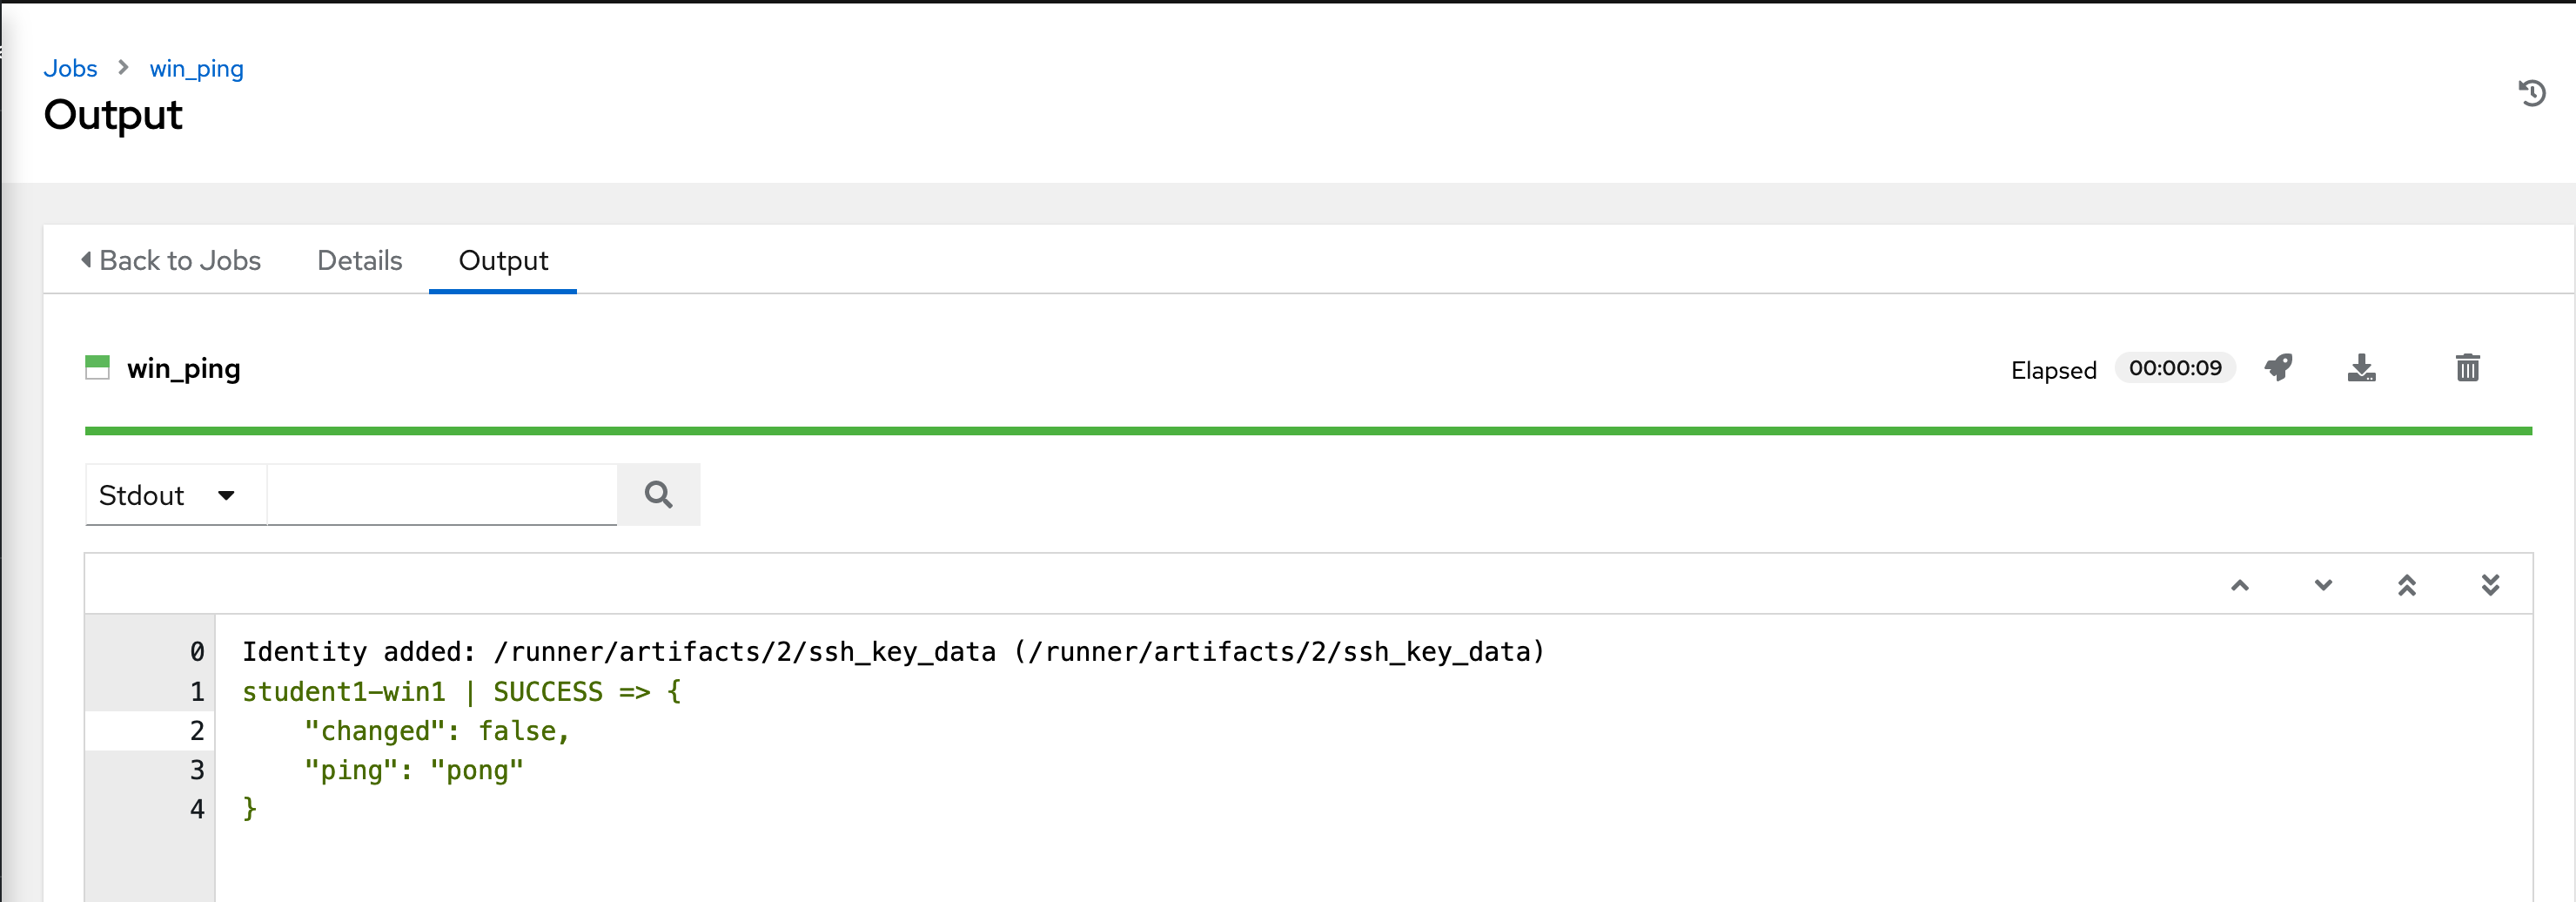
Let’s start with something really basic - pinging a host. The win_ping
module makes sure our windows hosts are responsive. This is not a
traditional ping, but actually verifying both connectivity and
authentication to the host.
Fill out this form as follows
| Key | Value | Note |
|---|---|---|
| Module | win_ping |
|
| Arguments | Intentionally blank | |
| Limit | This should display the host you selected in the previous step |
Click the Next button
| Key | Value | Note |
|---|---|---|
| Execution environment | windows workshop execution environment |
Click the Next button
| Key | Value | Note |
|---|---|---|
| Machine credential | Workshop Credential | |
Once you click LAUNCH you will be redirected to the Job log. Every job and action in Automation Controller is recorded and stored. These logs can also be exported automatically to another logging system such as Splunk or ELK.
The output tab is shown by default. Any output generated by the task is displayed here.
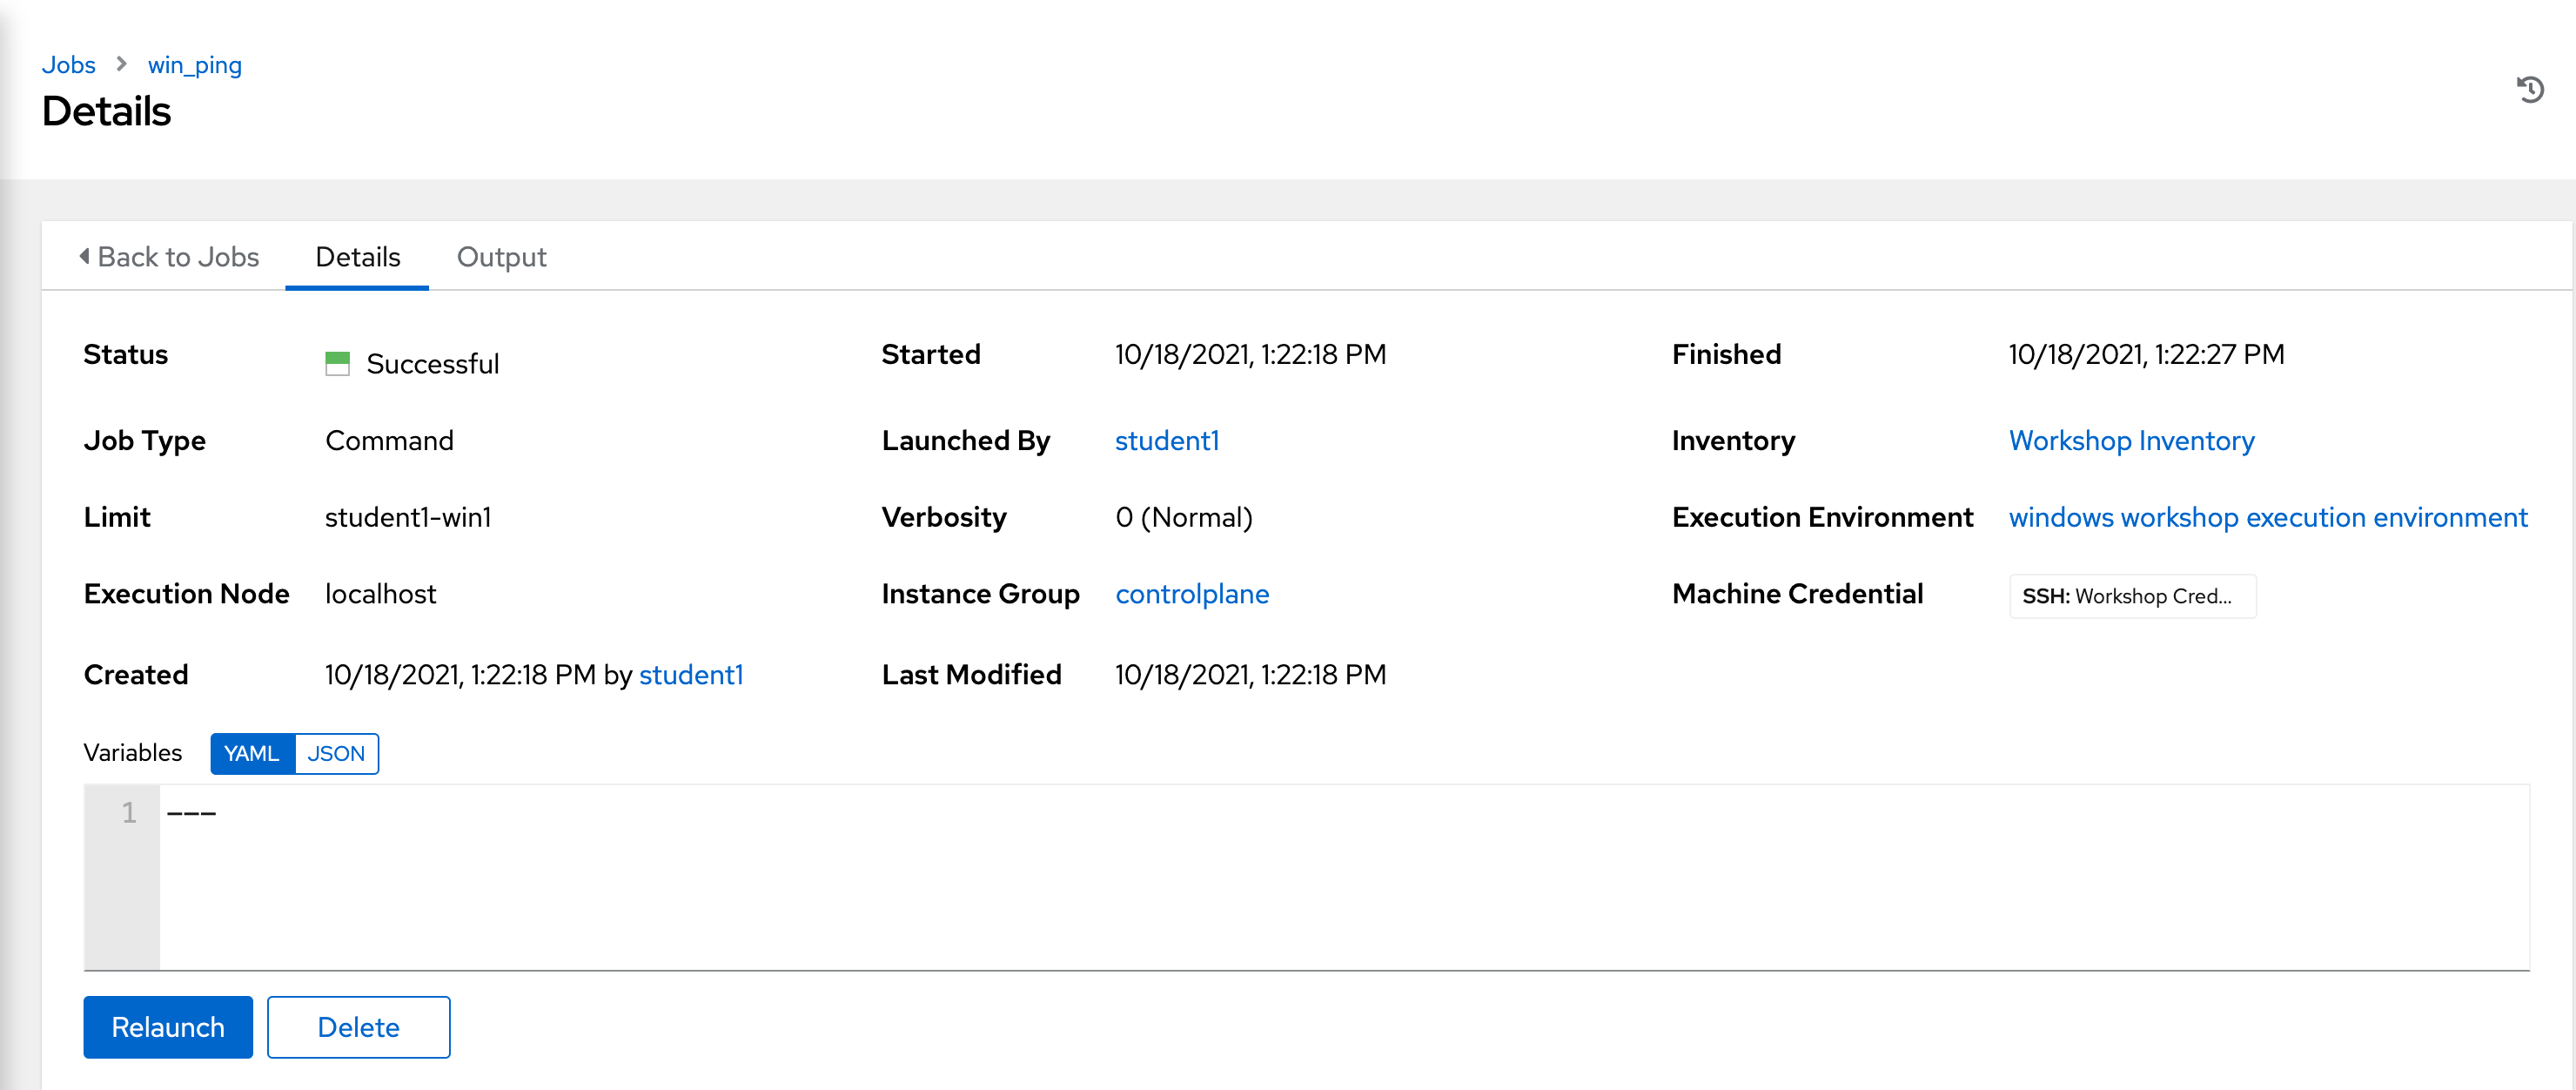
The details tab shows information on when the task was executed, by whom, with what credential and what hosts were affected.
The results returned will be different depending on which module is used, as they all handle and deal with different data sets depending on the task. No matter which module is used, you will always see a color coded STATUS of either SUCCESS, FAILURE, CHANGED, or SKIPPING.
Step 2
Now let’s see how we can run a PowerShell command and view the output
using the win_shell module.
Let’s fill out the form again, but this time use the win_shell module
to execute the Get-Service Powershell command.
| Key | Value | Note |
|---|---|---|
| Module | win_shell |
|
| Arguments | Get-Service |
|
| Limit | This should display the host you selected in the previous step |
Click the Next button
| Key | Value | Note |
|---|---|---|
| Execution environment | windows workshop execution environment |
Click the Next button
| Key | Value | Note |
|---|---|---|
| Machine credential | Workshop Credential | |
Launch the job and view the results. You will see that it returns a direct output of what the Powershell command returned. This data can be stored to a variable and directly parsed inside your Ansible playbook later on.
And run it one more time with the Get-Process Powershell command.
| Key | Value | Note |
|---|---|---|
| Module | win_shell |
|
| Arguments | Get-Process |
|
| Limit | This should display the host you selected in the previous step |
Click the Next button
| Key | Value | Note |
|---|---|---|
| Execution environment | windows workshop execution environment |
Click the Next button
| Key | Value | Note |
|---|---|---|
| Machine credential | Workshop Credential | |
Step 3
We will now take a look at your Windows node configuration. The setup
module queries the remote host for various data and returns that data as
Ansible facts. This data is useful to determine things such as operating system
version, hardware configuration, among other data points. This
can then be used in your playbook for all sorts of reasons such as
determining whether a task should even run, or determining what the name
of a package should be based upon the operating system version.
The setup module will run automatically at the beginning of every
playbook, unless configured not to, so that this data is always available to
your playbook.
Lets go ahead and run the setup module to look at the output. Fill out
the EXECUTE COMMAND form again with this info.
| Key | Value | Note |
|---|---|---|
| Module | setup |
|
| Arguments | Intentionally blank | |
| Limit | This should display the host you selected in the previous step |
Click the Next button
| Key | Value | Note |
|---|---|---|
| Execution environment | windows workshop execution environment |
Click the Next button
| Key | Value | Note |
|---|---|---|
| Machine credential | Workshop Credential | |
You should see output like this:
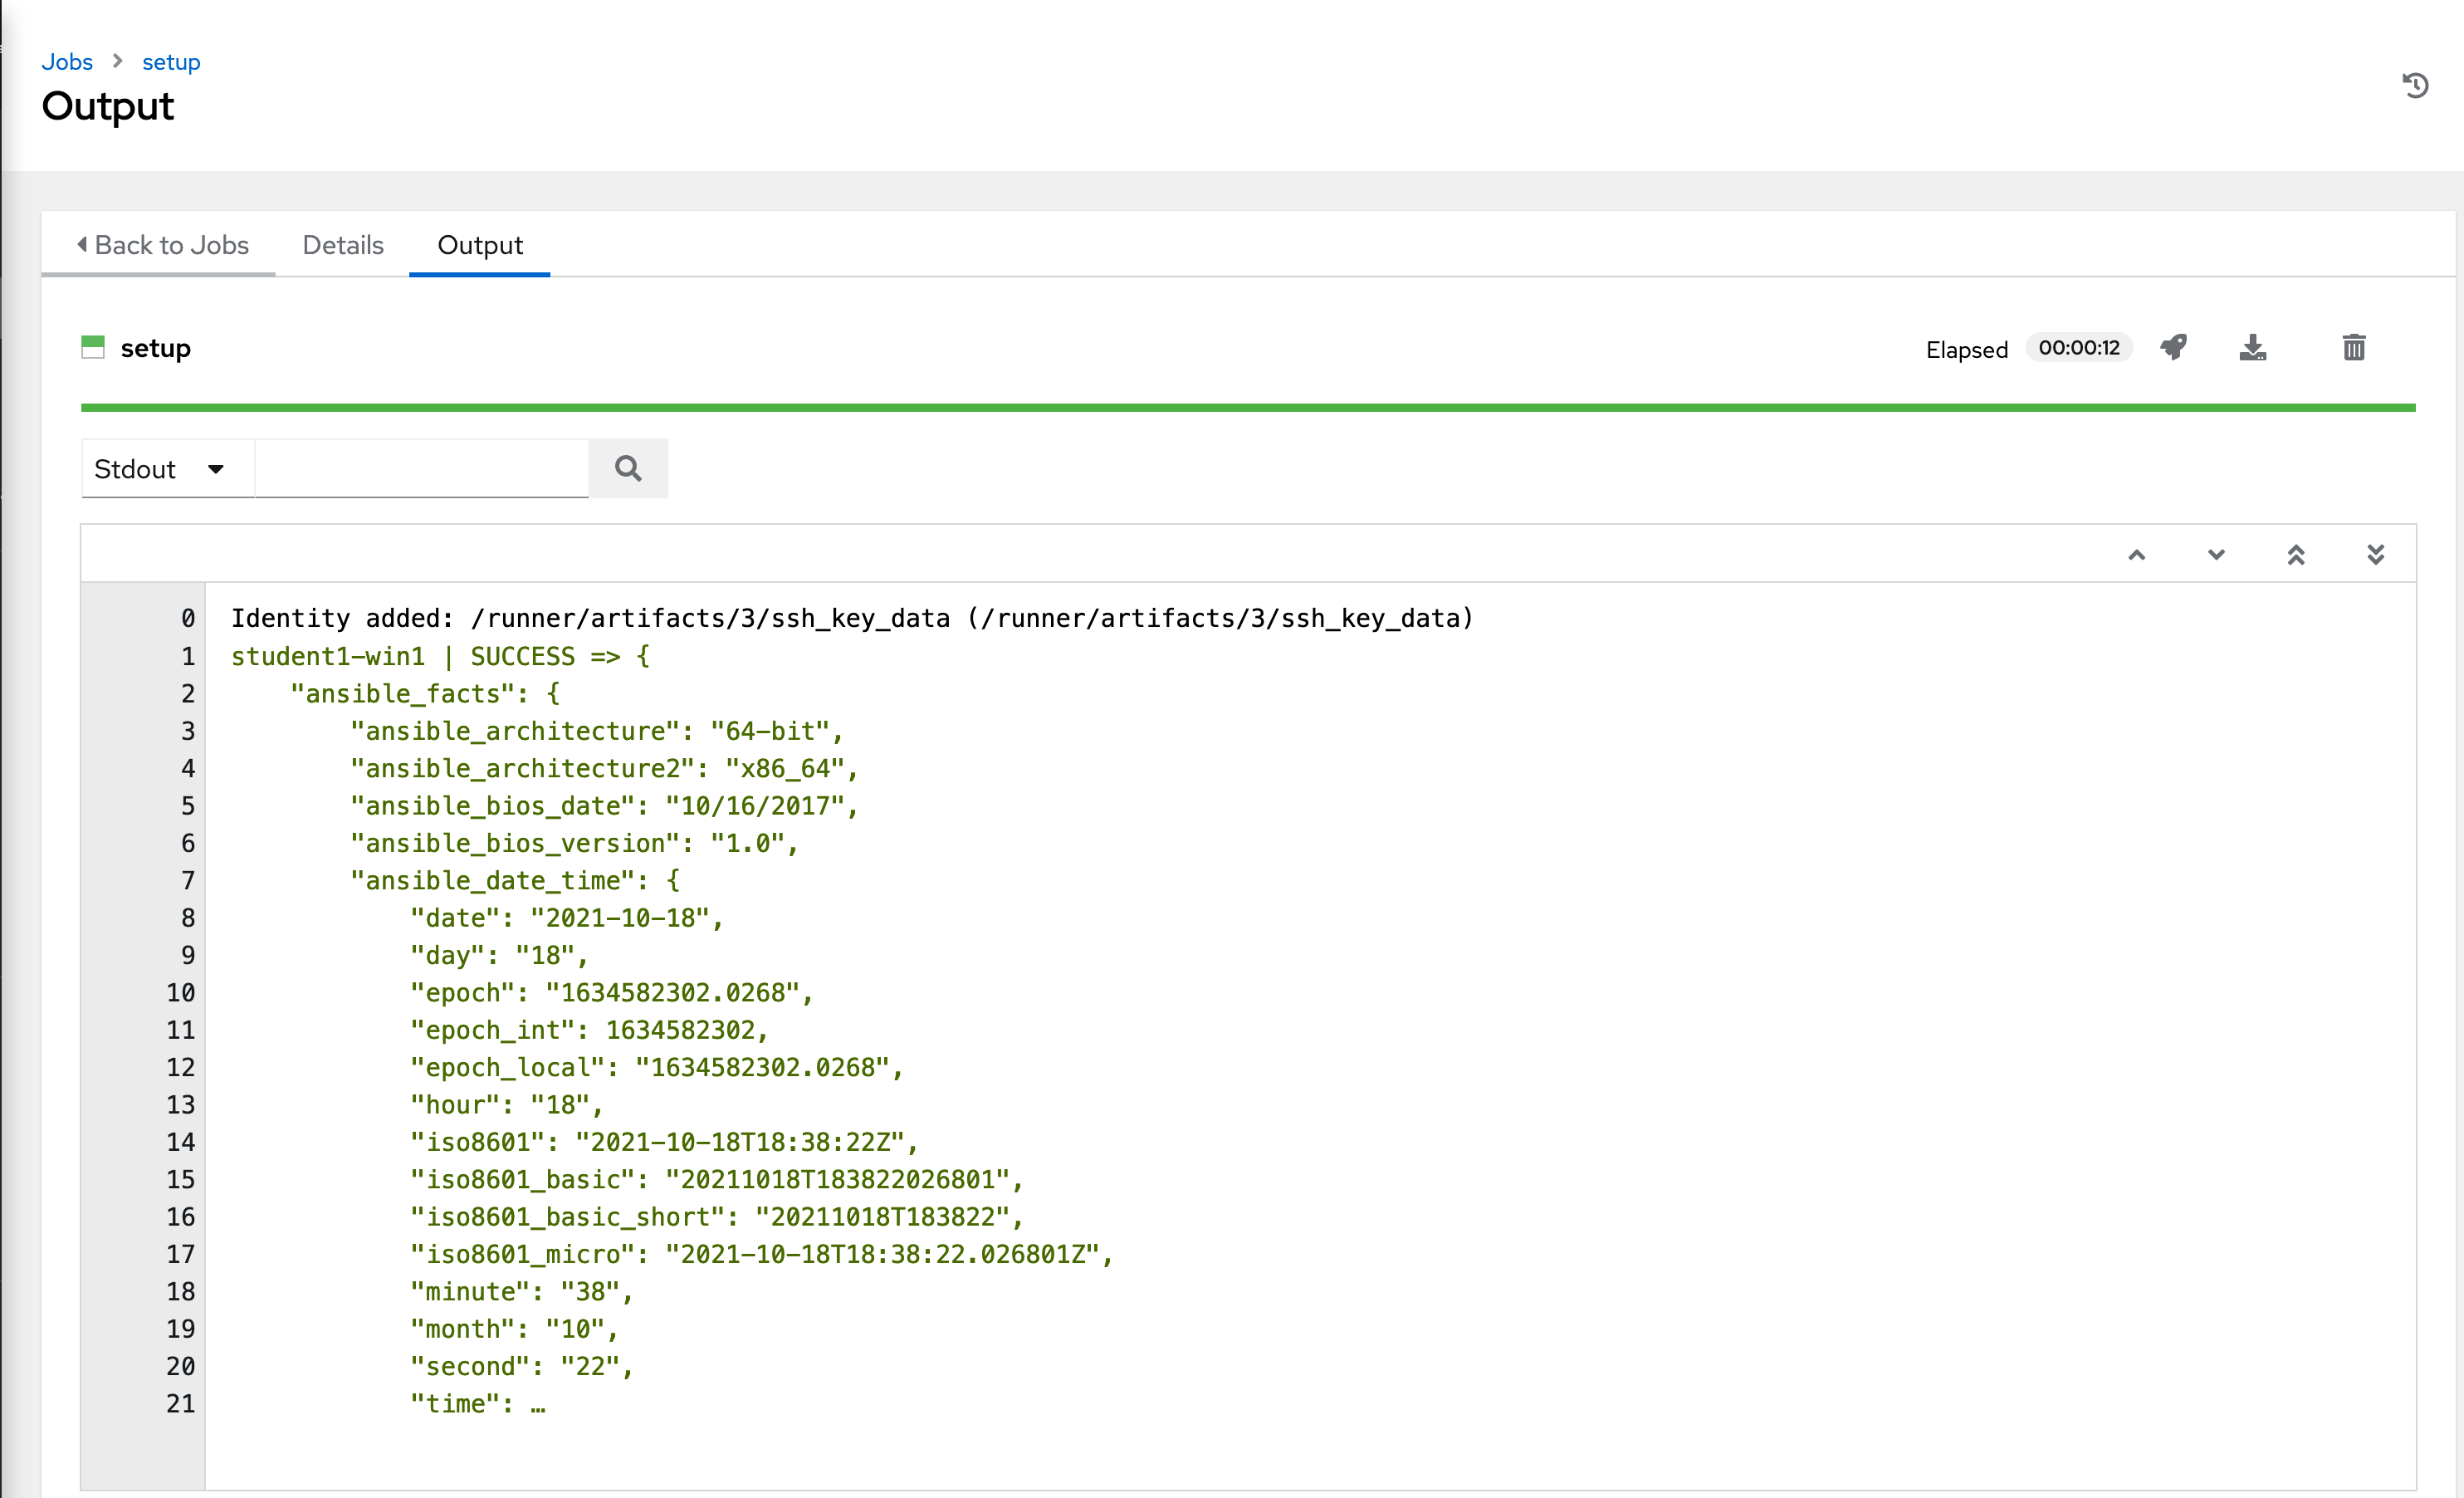
(Note: If you click the three dots shown on line 21 in the above output, you will see all the facts returned by the setup module.)
Step 4
Now, let’s install IIS using the win_feature module. Our arguments
parameter is going to get a little more complex now.
| Key | Value | Note |
|---|---|---|
| Module | win_feature |
|
| Arguments | name=Web-Server state=present |
|
| Limit | This should display the host you selected in the previous step |
Click the Next button
| Key | Value | Note |
|---|---|---|
| Execution environment | windows workshop execution environment |
Click the Next button
| Key | Value | Note |
|---|---|---|
| Machine credential | Workshop Credential |
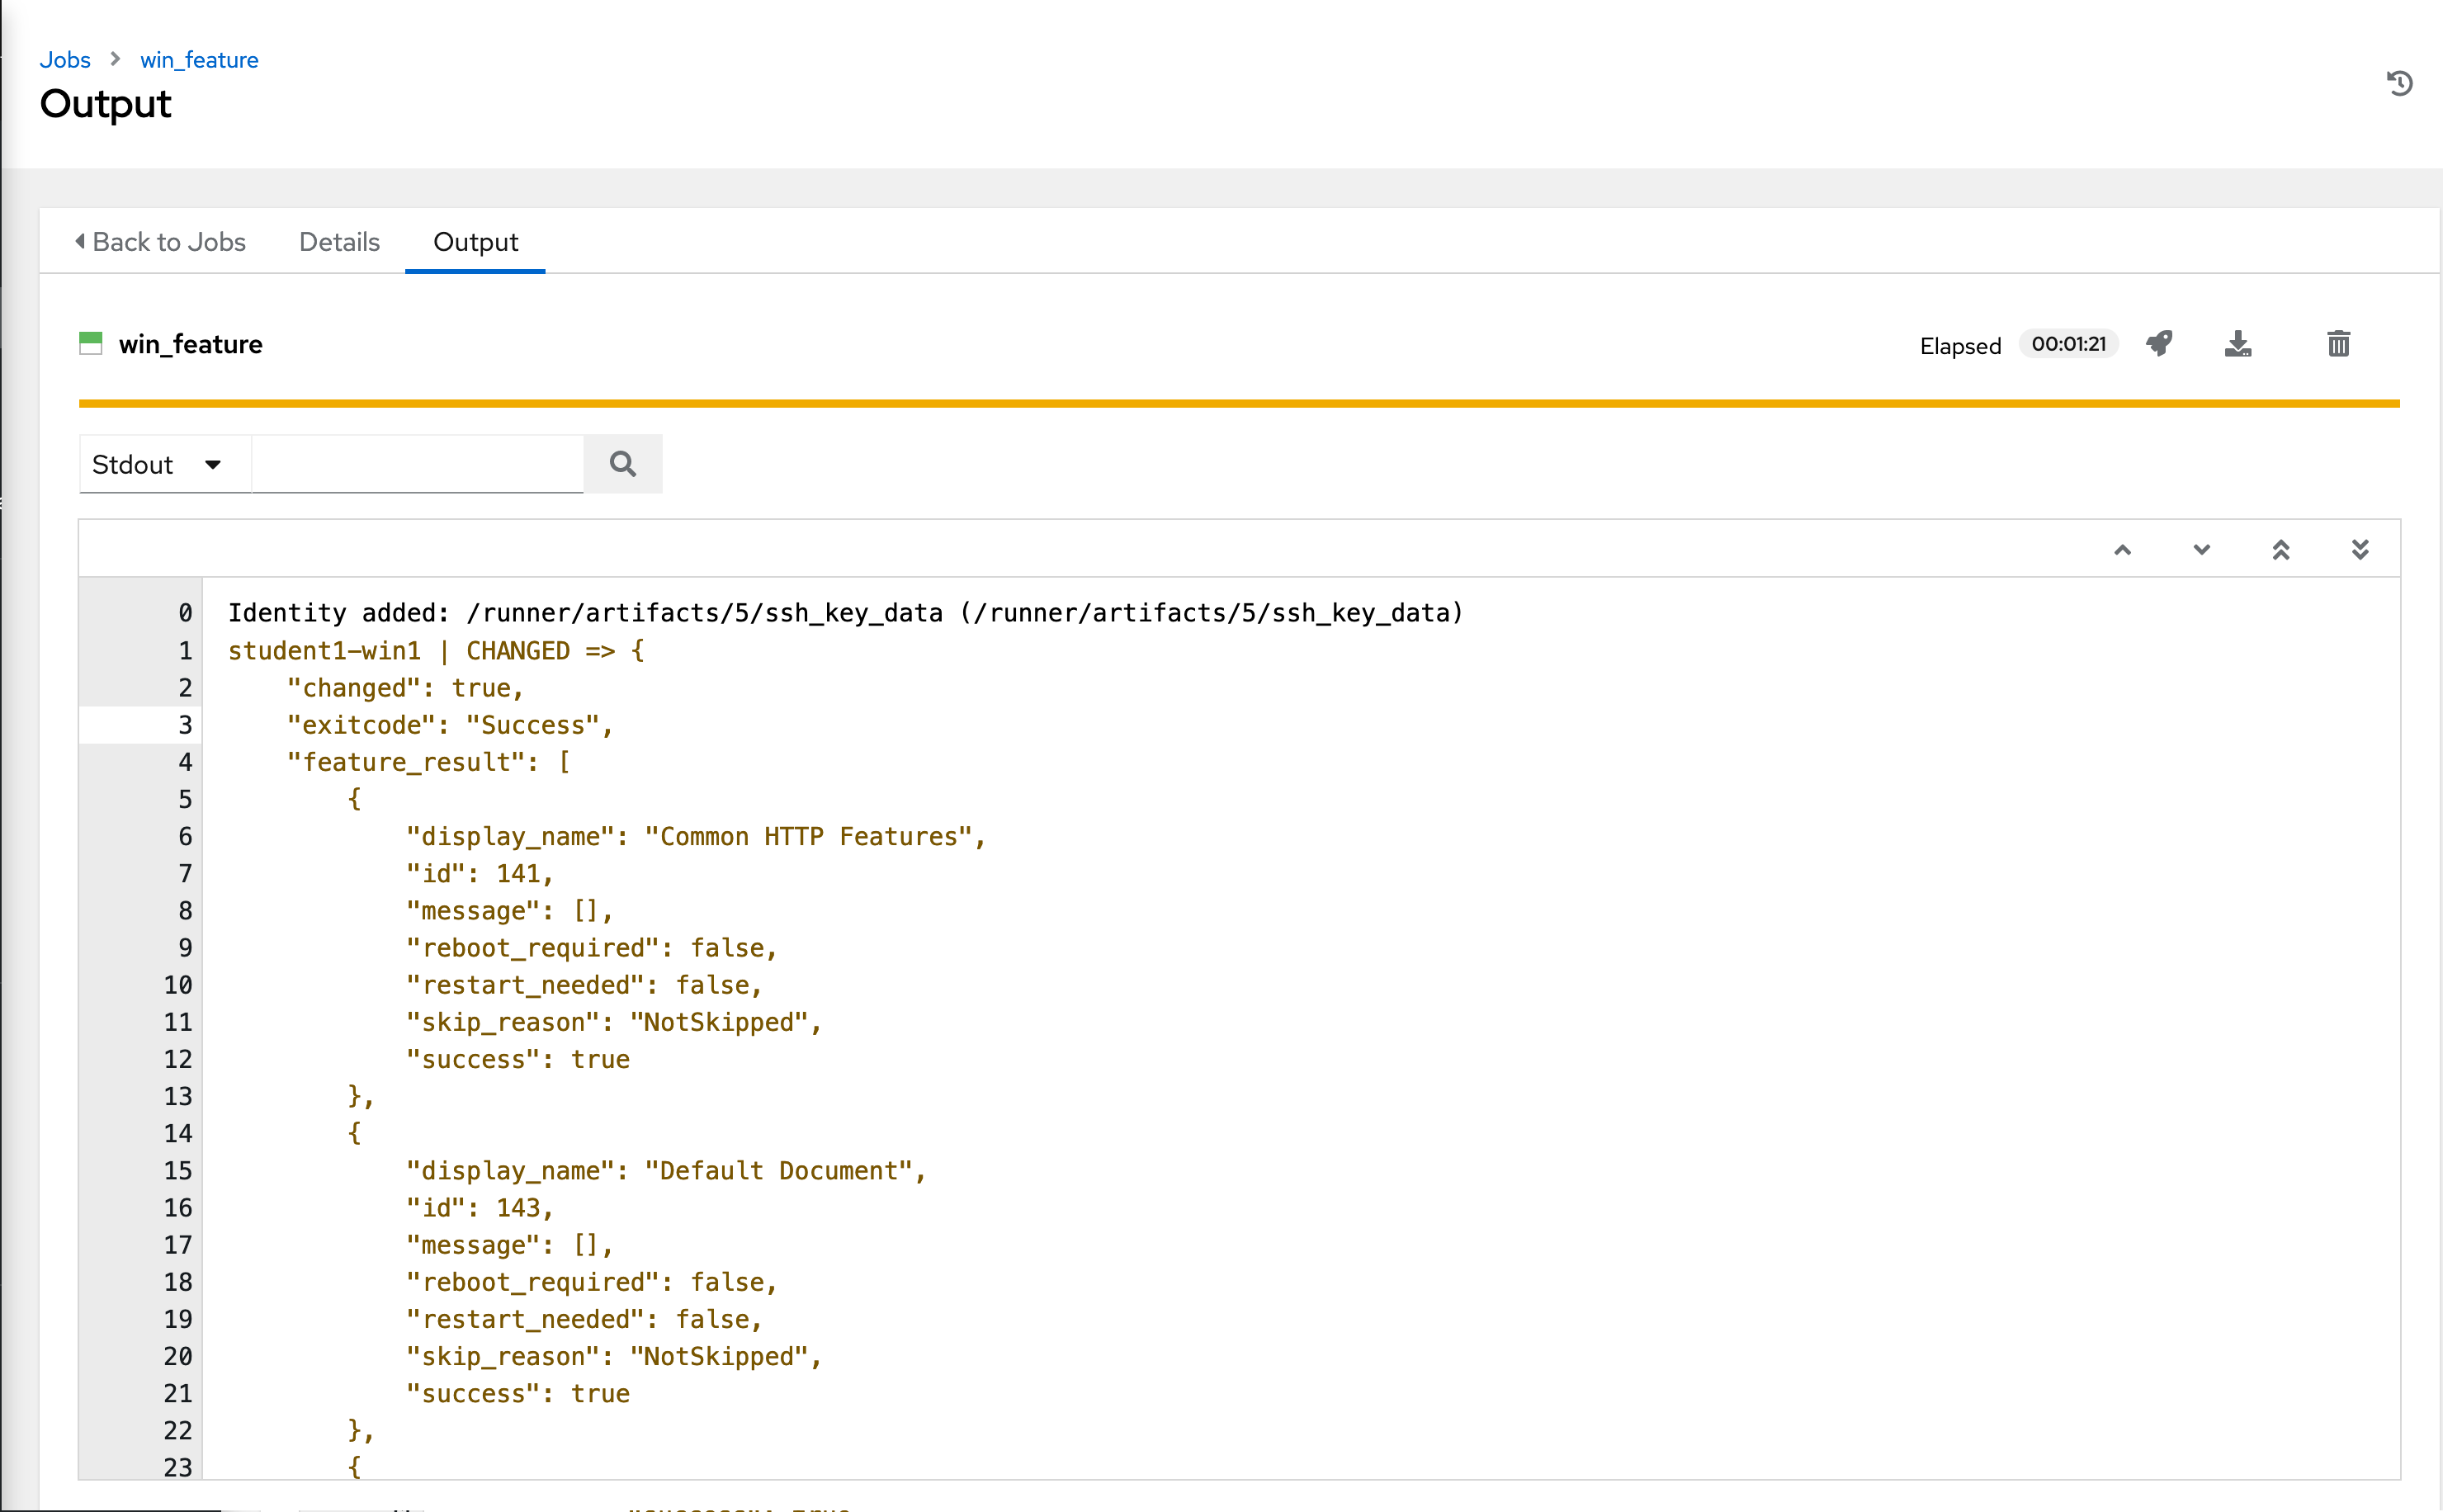
You will notice that the log text is now orange. This is to denote that a change was made on the system versus the green that shows that no changes were made earlier.
Step 5
OK, IIS is installed now so let’s be certain it is started using the
win_service module.
| Key | Value | Note |
|---|---|---|
| Module | win_service |
|
| Arguments | name=W3Svc state=started |
|
| Limit | This should display the host you selected in the previous step |
Click the Next button
| Key | Value | Note |
|---|---|---|
| Execution environment | windows workshop execution environment |
Click the Next button
| Key | Value | Note |
|---|---|---|
| Machine credential | Workshop Credential |
Step 6
Finally, let’s clean up after ourselves. First, stop the IIS service.
| Key | Value | Note |
|---|---|---|
| Module | win_service |
|
| Arguments | name=W3Svc state=stopped |
|
| Limit | This should display the host you selected in the previous step |
Click the Next button
| Key | Value | Note |
|---|---|---|
| Execution environment | windows workshop execution environment |
Click the Next button
| Key | Value | Note |
|---|---|---|
| Machine credential | Workshop Credential | |
Step 7
Next, remove the IIS feature.
| Key | Value | Note |
|---|---|---|
| Module | win_feature |
|
| Arguments | name=Web-Server state=absent |
|
| Limit | This should display the host you selected in the previous step |
Click the Next button
| Key | Value | Note |
|---|---|---|
| Execution environment | windows workshop execution environment |
Click the Next button
| Key | Value | Note |
|---|---|---|
| Machine credential | Workshop Credential | |
And now reboot the host.
| Key | Value | Note |
|---|---|---|
| Module | win_reboot |
|
| Arguments | Intentionally blank | |
| Limit | This should display the host you selected in the previous step |
Click the Next button
| Key | Value | Note |
|---|---|---|
| Execution environment | windows workshop execution environment |
Click the Next button
| Key | Value | Note |
|---|---|---|
| Machine credential | Workshop Credential | |
Note
The
win_rebootmodule will cause the machine to reboot, and then will wait for it to come completely back up before finishing. This way, if you need to reboot the host in the middle of your playbook, the rest of the playbook will not fail because the host is inaccessible.
End Result
ad-hoc commands may be useful to run once in a while. However, as automation continues to grow within an environment, they are used less and less often. In the IIS example above, this could have (should have) been written out in a playbook instead of executed through a laborious series of ad-hoc commands. This interaction with ad-hoc commands seems to mimic running individual commands from a CLI. Additional exercises will really make this clear.
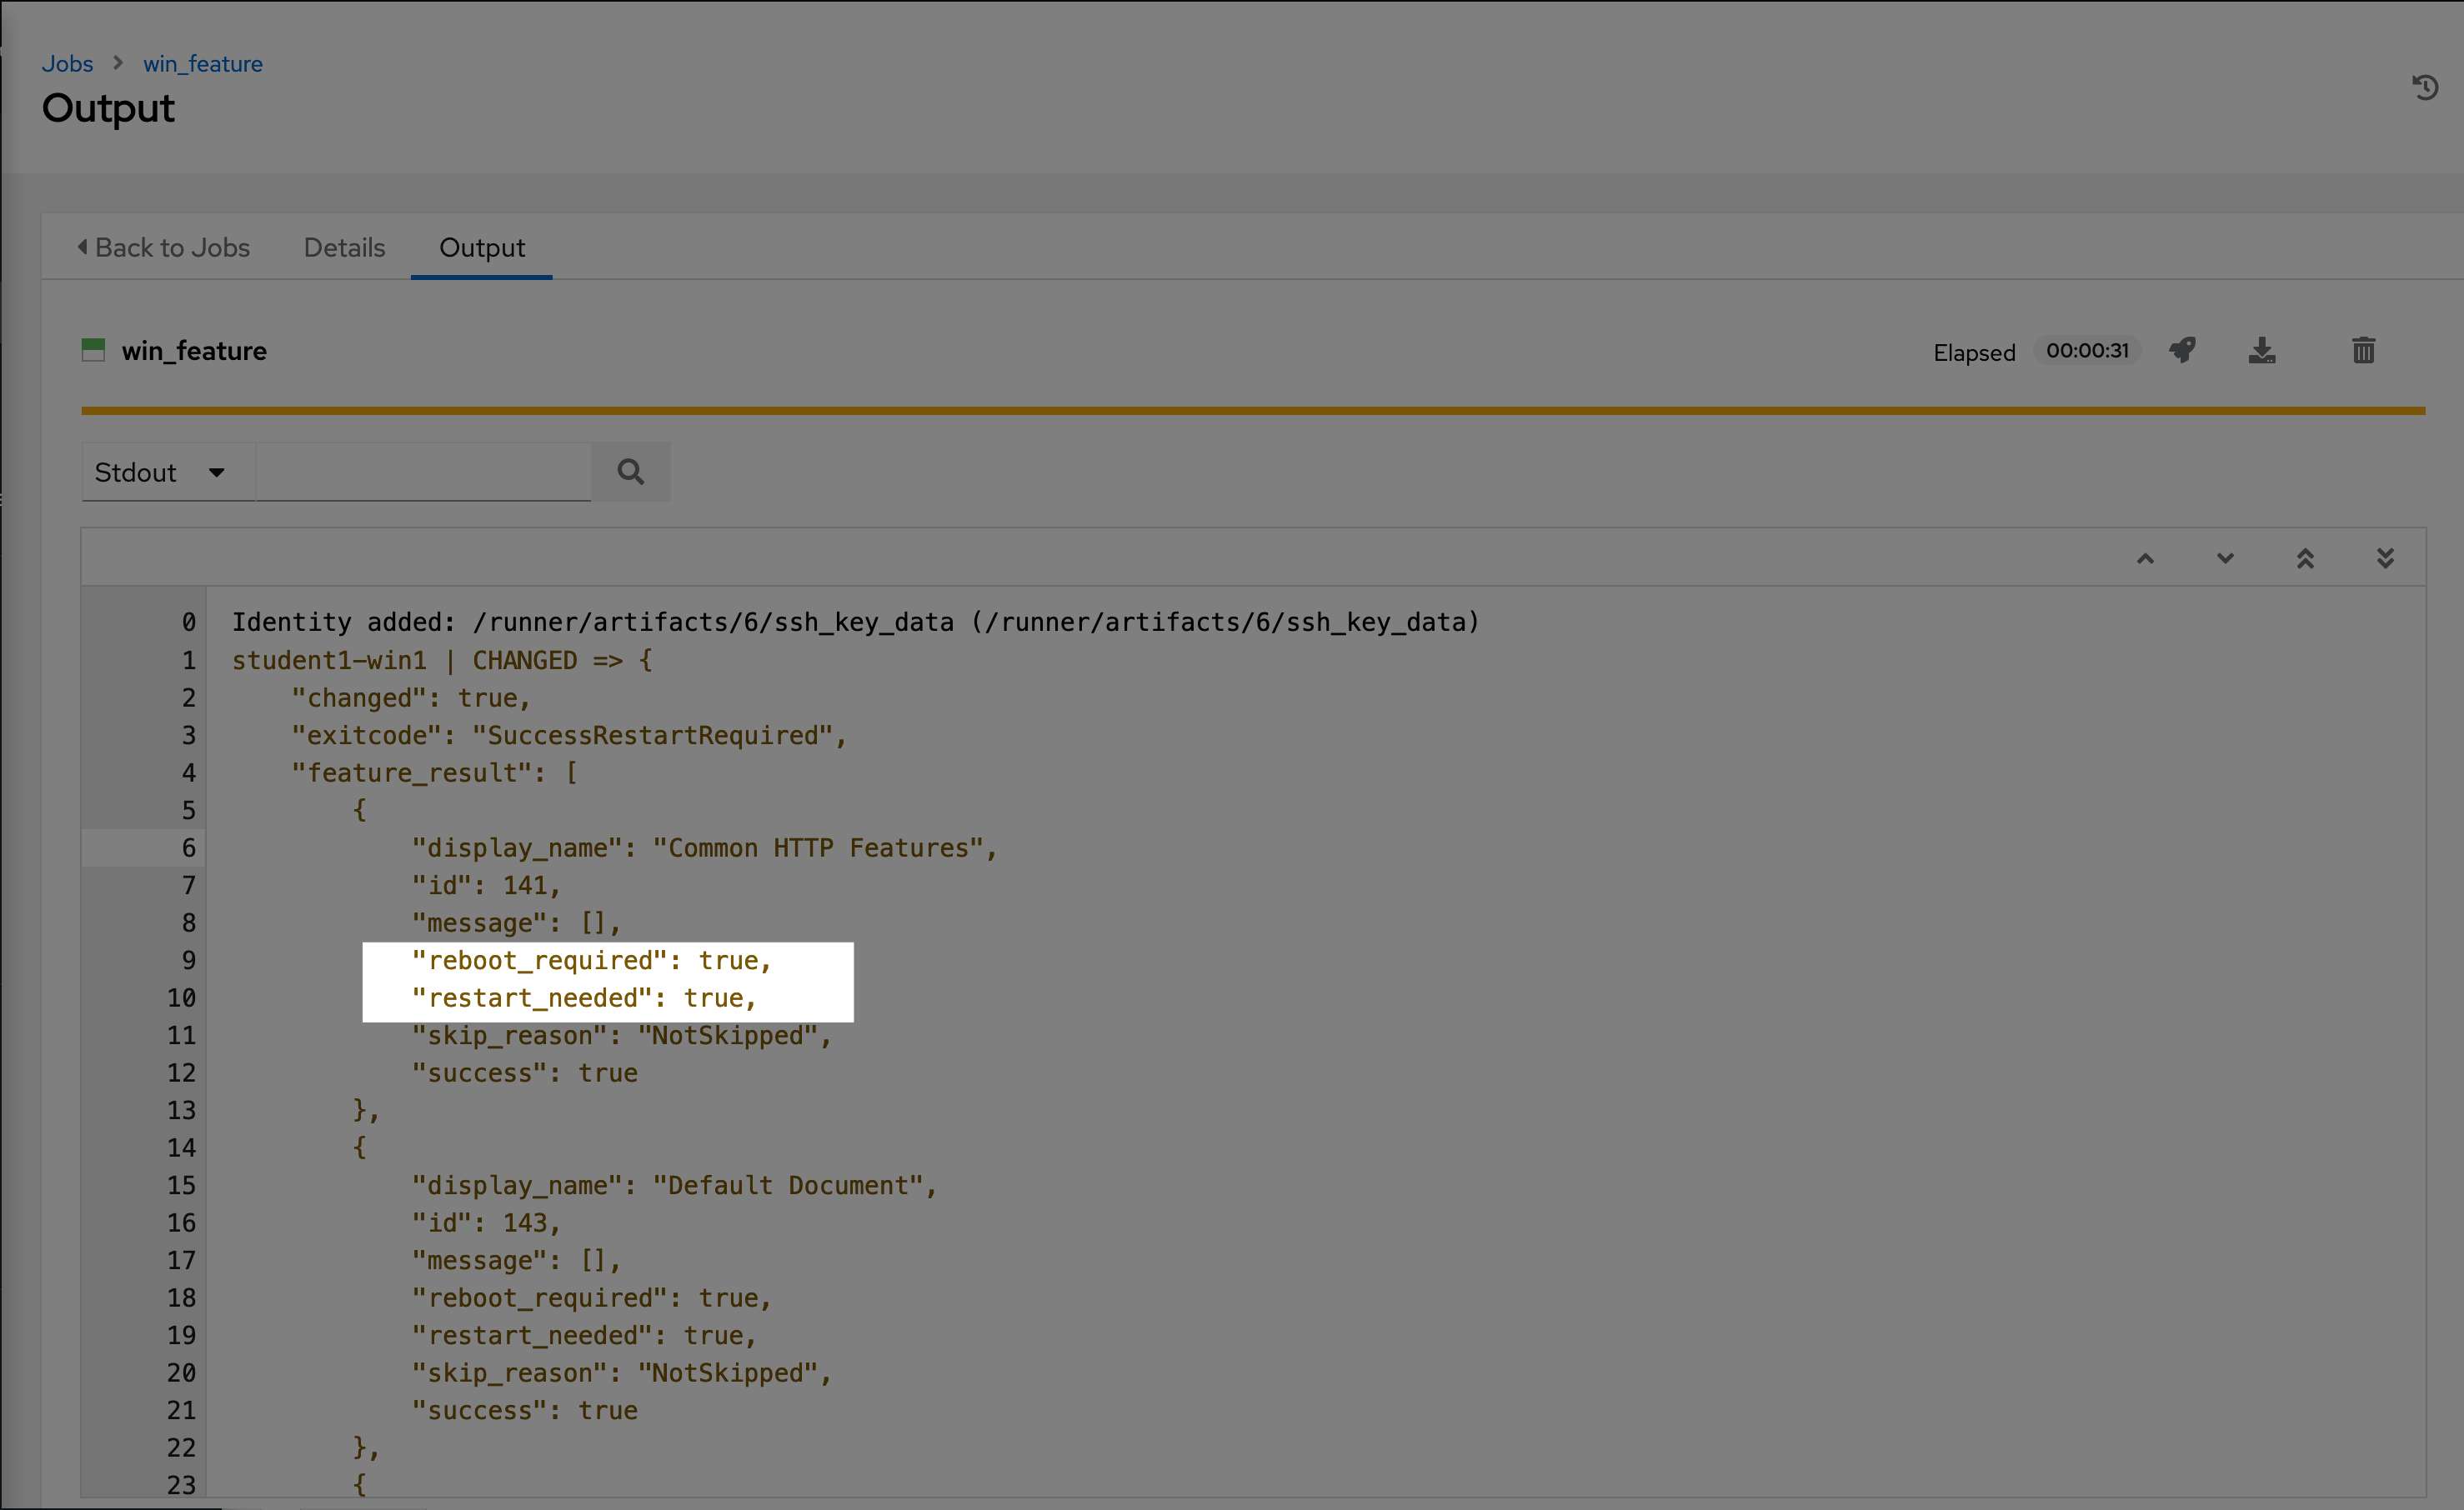
Also, did you catch this? When a task is performed on a Windows server, Ansible is smart enough to know whether a reboot is required after executing that task. The below is part of the output of the command to remove the IIS feature. The output of this task can be used in subsequent tasks, like whether or not to reboot before continuing.