Exercise 1 - Exploring the lab environment
Read this in other languages:  English,
  日本語,
日本語,  Español.
Table of Contents
- Exercise 1 - Exploring the lab environment
- Table of Contents
- Objective
- Diagram
- Guide
- Step 1 - Connecting via VS Code
- Step 2 - Using the Terminal
- Step 3 - Examining Execution Environments
- Step 4 - Examining the ansible-navigator configuration
- Step 5 - Examining inventory
- Step 6 - Understanding inventory
- Step 7 - Using ansible-navigator to explore inventory
- Step 8 - Connecting to network devices
- Complete
Objective
Explore and understand the lab environment.
These first few lab exercises will be exploring the command-line utilities of the Ansible Automation Platform. This includes
- ansible-navigator - a command line utility and text-based user interface (TUI) for running and developing Ansible automation content.
- ansible-core - the base executable that provides the framework, language and functions that underpin the Ansible Automation Platform. It also includes various cli tools like
ansible,ansible-playbookandansible-doc. Ansible Core acts as the bridge between the upstream community with the free and open source Ansible and connects it to the downstream enterprise automation offering from Red Hat, the Ansible Automation Platform. - Execution Environments - not specifically covered in this workshop because the built-in Ansible Execution Environments already included all the Red Hat supported collections which includes all the network collections we use for this workshop. Execution Environments are container images that can be utilized as Ansible execution.
- ansible-builder - not specifically covered in this workshop,
ansible-builderis a command line utility to automate the process of building Execution Environments.
If you need more information on new Ansible Automation Platform components bookmark this landing page https://red.ht/AAP-20
Join our community forum!
Before you get started, please join us on https://forum.ansible.com/. This will allow you to get Ansible help after the workshops concludes.
Diagram

Guide
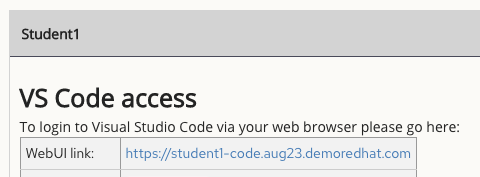
Step 1 - Connecting via VS Code
It is highly encouraged to use Visual Studio Code to complete the workshop exercises. Visual Studio Code provides:
|
|---|
-
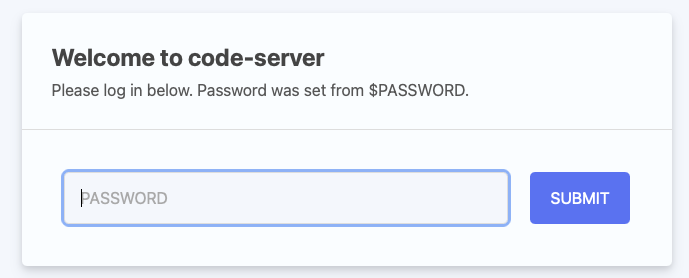
Connect to Visual Studio Code from the Workshop launch page (provided by your instructor). The password is provided below the WebUI link.
-
Type in the provided password to connect.
-
Open the
network-workshopdirectory in Visual Studio Code: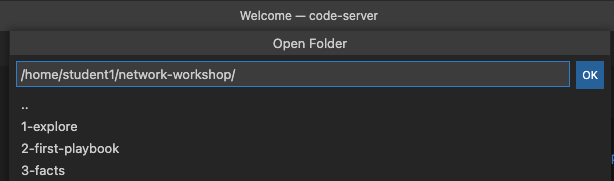
-
Click on the
playbook.ymlto view the content.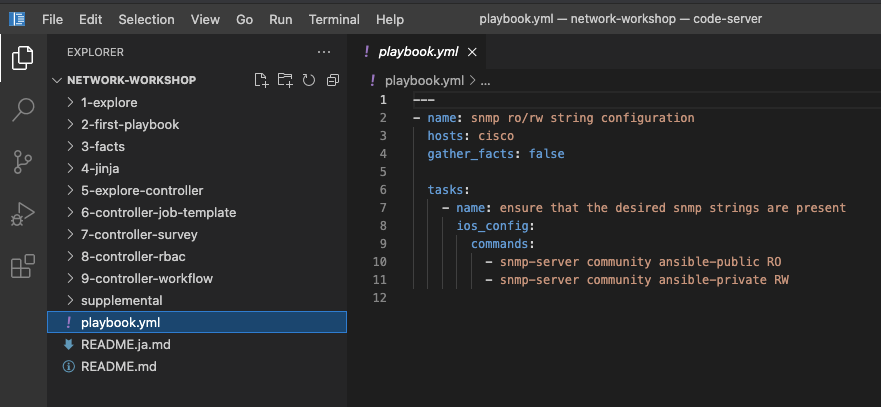
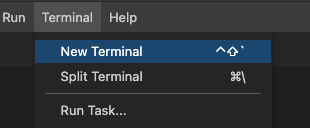
Step 2 - Using the Terminal
-
Open a terminal in Visual Studio Code:
Navigate to the network-workshop directory on the Ansible control node terminal.
[student@ansible-1 ~]$ cd ~/network-workshop/
[student@ansible-1 network-workshop]$ pwd
/home/student/network-workshop
[student@ansible-1 network-workshop]$
~- the tilde in this context is a shortcut for the home directory, i.e./home/studentcd- Linux command to change directorypwd- Linux command for print working directory. This will show the full path to the current working directory.
Step 3 - Examining Execution Environments
Run the ansible-navigator command with the images argument to look at execution environments configured on the control node:
$ ansible-navigator images

Note
The output you see might differ from the above output
This command gives you information about all currently installed Execution Environments or EEs for short. Investigate an EE by pressing the corresponding number. For example pressing 0 with the above example will open the network-ee execution environment:
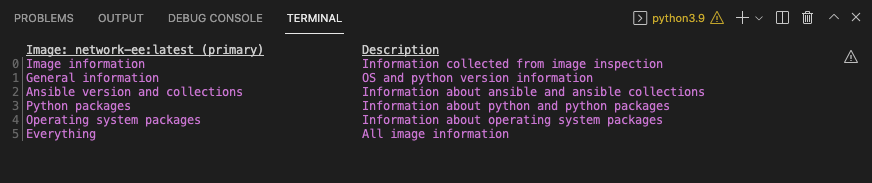
Selecting 2 for Ansible version and collections will show us all Ansible Collections installed on that particular EE, and the version of ansible-core:

Step 4 - Examining the ansible-navigator configuration
Either use Visual Studio Code to open or use the cat command to view the contents of the ansible-navigator.yml file. The file is located in the home directory:
$ cat .ansible-navigator.yml
---
ansible-navigator:
  ansible:
    inventory:
      entries:
      - /home/student/lab_inventory/hosts

  execution-environment:
    image: quay.io/acme_corp/network-ee:latest
    enabled: true
    container-engine: podman
    pull:
      policy: missing
    volume-mounts:
    - src: "/etc/ansible/"
      dest: "/etc/ansible/"
Note the following parameters within the ansible-navigator.yml file:
inventories: shows the location of the ansible inventory being usedexecution-environment: where the default execution environment is set
For a full listing of every configurable knob checkout the documentation
Step 5 - Examining inventory
The scope of a play within a playbook is limited to the groups of hosts declared within an Ansible inventory. Ansible supports multiple inventory types. An inventory could be a simple flat file with a collection of hosts defined within it or it could be a dynamic script (potentially querying a CMDB backend) that generates a list of devices to run the playbook against.
In this lab you will work with a file based inventory written in the ini format. Either use Visual Studio Code to open or use the cat command to view the contents of the ~/lab_inventory/hosts file.
$ cat ~/lab_inventory/hosts
[all:vars]
ansible_ssh_private_key_file=~/.ssh/aws-private.pem

[routers:children]
cisco
juniper
arista

[cisco]
rtr1 ansible_host=18.222.121.247 private_ip=172.16.129.86
[arista]
rtr2 ansible_host=18.188.194.126 private_ip=172.17.158.197
rtr4 ansible_host=18.221.5.35 private_ip=172.17.8.111
[juniper]
rtr3 ansible_host=3.14.132.20 private_ip=172.16.73.175

[cisco:vars]
ansible_user=ec2-user
ansible_network_os=ios
ansible_connection=network_cli

[juniper:vars]
ansible_user=ec2-user
ansible_network_os=junos
ansible_connection=netconf

[arista:vars]
ansible_user=ec2-user
ansible_network_os=eos
ansible_connection=network_cli
ansible_become=true
ansible_become_method=enable

[dc1]
rtr1
rtr3

[dc2]
rtr2
rtr4

[control]
ansible ansible_host=13.58.149.157 ansible_user=student private_ip=172.16.240.184
Step 6 - Understanding inventory
In the above output every [ ] defines a group. For example [dc1] is a group that contains the hosts rtr1 and rtr3. Groups can also be nested. The group [routers] is a parent group to the group [cisco]
Parent groups are declared using the children directive. Having nested groups allows the flexibility of assigining more specific values to variables.
We can associate variables to groups and hosts.
Note:
A group called all always exists and contains all groups and hosts defined within an inventory.
Host variables can be defined on the same line as the host themselves. For example for the host rtr1:
rtr1 ansible_host=18.222.121.247 private_ip=172.16.129.86
rtr1- The name that Ansible will use. This can but does not have to rely on DNSansible_host- The IP address that ansible will use, if not configured it will default to DNSprivate_ip- This value is not reserved by ansible so it will default to a host variable. This variable can be used by playbooks or ignored completely.
Group variables groups are declared using the vars directive. Having groups allows the flexibility of assigning common variables to multiple hosts. Multiple group variables can be defined under the [group_name:vars] section. For example look at the group cisco:
[cisco:vars]
ansible_user=ec2-user
ansible_network_os=ios
ansible_connection=network_cli
ansible_user- The user ansible will be used to login to this host, if not configured it will default to the user the playbook is run fromansible_network_os- This variable is necessary while using thenetwork_cliconnection type within a play definition, as we will see shortly.ansible_connection- This variable sets the connection plugin for this group. This can be set to values such asnetconf,httpapiandnetwork_clidepending on what this particular network platform supports.
Step 7 - Using ansible-navigator to explore inventory
We can also use the ansible-navigator TUI to explore inventory.
Run the ansible-navigator inventory command to bring up inventory in the TUI:
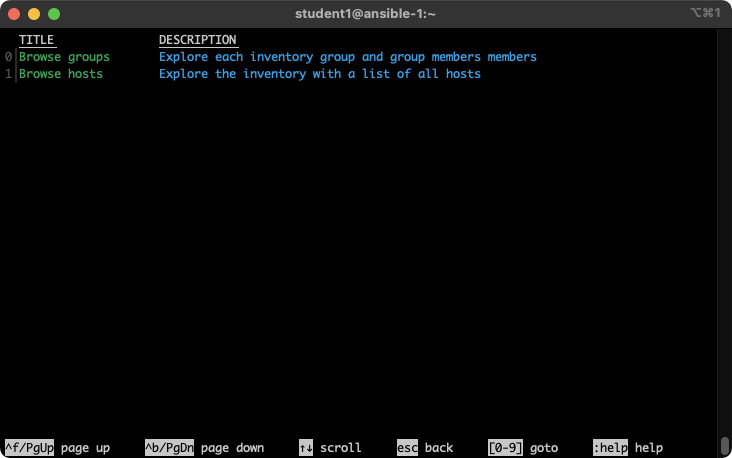
Pressing 0 or 1 on your keyboard will open groups or hosts respectively.
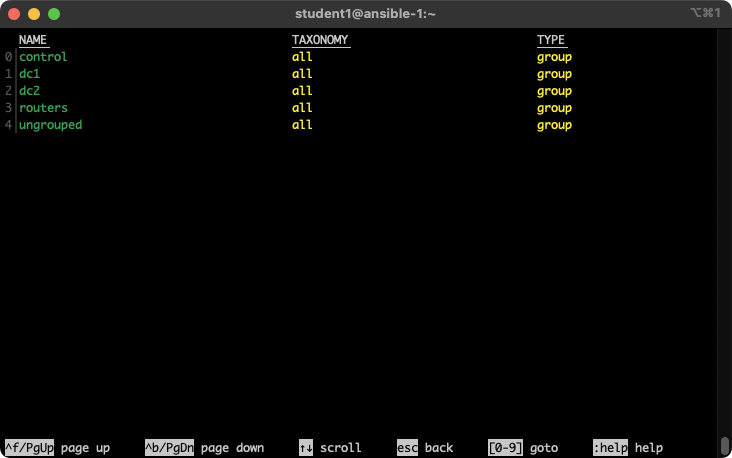
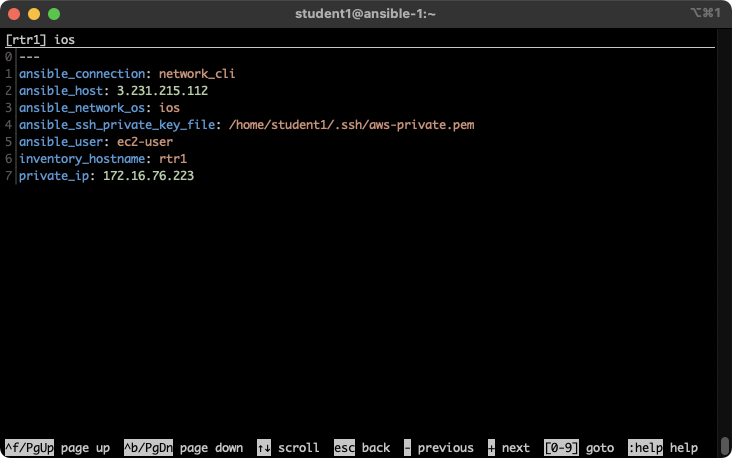
Press the Esc key to go up a level, or you can zoom in to an individual host:
Step 8 - Connecting to network devices
There are four routers, named rtr1, rtr2, rtr3 and rtr4. The network diagram is always available on the network automation workshop table of contents. The SSH configuration file (~/.ssh/config) is already setup on the control node. This means you can SSH to any router from the control node without a login:
For example to connect to rtr1 from the Ansible control node, type:
$ ssh rtr1
For example:
$ ssh rtr1
Warning: Permanently added 'rtr1,35.175.115.246' (RSA) to the list of known hosts.


rtr1#show ver
Cisco IOS XE Software, Version 16.09.02
Note
The workshops have just been upgraded to Red Hat Enterprise Linux 9 which is using a newer more secure system-wide cryptographic policy. If you hit the issue
no mutual signature supportedfor a Cisco network device, please run the commandsudo update-crypto-policies --set LEGACYand exit/restart your terminal so the policy will take effect. This will be fixed in a future workshop release. Please open issues on https://github.com/ansible/workshops
Complete
You have completed lab exercise 1!
You now understand:
- How to connect to the lab environment with Visual Studio Code
- How to explore execution environments with
ansible-navigator - Where the Ansible Navigator Configuration (
ansible-navigator.yml) is located - Where the inventory is stored for command-line exercises
- How to use ansible-navigator TUI (Text-based user interface)
Click Here to return to the Ansible Network Automation Workshop