Adicional - Configuración de Red con Plantillas Jinja
Leálo en otros idiomas:  English,
  , 日本語,
  Español.
Índice
Objetivo
Demonstration templating a network configuration and pushing it a device
- Use and understand group variables to store the IP addresses we want.
- Use the Jinja2 template lookup plugin
- Demonstrate use of the network automation cli_config module
Guide
Paso 1 - Crear variables de grupo
This Paso will cover creating Ansible variables for use in an Ansible Playbook. This exercise will use the following IP address schema for loopbacks addresses on rtr1 and rtr2:
| Device | Loopback100 IP |
|---|---|
| rtr1 | 192.168.100.1/32 |
| rtr2 | 192.168.100.2/32 |
Variable information can be stored in host_vars and group_vars. For this exercise create a folder named group_vars:
-
Create a new folder called
group_vars. Right click on the Explorer toolbar on the left side of Visual Studio Code and select New Folder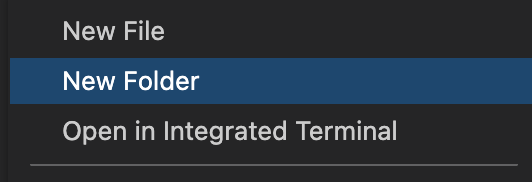
-
Create a new file called
all.yml. Right click on the Explorer toolbar on the left side of Visual Studio Code and select New File inside thegroup_varsdirectory.
The interface and IP address information above must be stored as variables so that the Ansible playbook can use it. Start by making a simple YAML dictionary that stores the table listed above. Use a top level variable (e.g. nodes) so that a lookup can be performed based on the inventory_hostname:
nodes:
  rtr1:
    Loopback100: "192.168.100.1"
  rtr2:
    Loopback100: "192.168.100.2"
Copy the YAML dictionary we created above into the group_vars/all.yml file and save the file.
All devices are part of the group all by default. If we create a group named cisco only network devices belonging to that group would be able to access those variables.
Paso 2 - Crear plantillas Jinja2
Create a new file called template.j2 in the network-workshop directory. Right click on the Explorer toolbar on the left side of Visual Studio Code and select New File. The directory stucture will look like this:
├── group_vars
│   └── all.yml
├── template.j2
Copy the following into the template.j2 file:
{% for interface,ip in nodes[inventory_hostname].items() %}
interface {{interface}}
  ip address {{ip}} 255.255.255.255
{% endfor %}
Save the file.
Paso 3 - Explorar la plantilla Jinja2
This Paso will explain and elaborate on each part of the newly created template.j2 file.
{% for interface,ip in nodes[inventory_hostname].items() %}
- Pieces of code in a Jinja template are escaped with
{%and%}. Theinterface,ipbreaks down the dictionary into a key namedinterfaceand a value namedip.
- The
nodes[inventory_hostname]does a dictionary lookup in thegroup_vars/all.ymlfile. The inventory_hostname is the name of the hostname as configured in Ansible’s inventory host file. When the playbook is executed againstrtr1inventory_hostname will bertr1, when the playbook is executed againstrtr2, the inventory_hostname will bertr2and so forth.
The inventory_hostname variable is considered a magic variable which is automatically provided.
- The keyword
items()returns a list of dictionaries. In this case the dictionary’s key is the interface name (e.g. Loopback100) and the value is an IP address (e.g. 192.168.100.1)
interface {{interface}}
  ip address {{ip}} 255.255.255.255
- Variables are rendered with the curly braces like this: `` In this case the variable name key and value only exist in the context of the loop. Outside of the loop those two variables don’t exist. Each iteration will re-assign the variable name to new values based on what we have in our variables.
Finally:
{% endfor %}
- In Jinja we need to specify the end of the loop.
Paso 4 - Crear un playbook
- Create a new Ansible Playbook file called
config.yml. Right click on the Explorer toolbar on the left side of Visual Studio Code and select New File . Either copy the playbook below or type this in:
---
- name: configure network devices
  hosts: rtr1,rtr2
  gather_facts: false
  tasks:
    - name: configure device with config
      cli_config:
        config: "{{ lookup('template', 'template.j2') }}"
- This Ansible Playbook has one task named configure device with config
- The cli_config module is vendor agnostic. This module will work identically for an Arista, Cisco and Juniper device. This module only works with the network_cli connection plugin.
- The cli_config module only requires one parameter, in this case config which can point to a flat file, or in this case uses the lookup plugin. For a list of all available lookup plugins visit the documentation
- Using the template lookup plugin requires two parameters, the plugin type template and the corresponding template name template.j2.
Paso 5 - Ejecutar el Playbook de Ansible
Use the ansible-navigator command to execute the playbook:
[student@ansible network-workshop]$ ansible-playbook config.yml
The output will look similar to the following:.
[student@ansible-1 network-workshop]$ ansible-navigator run config.yml --mode stdout

PLAY [configure network devices] ***********************************************

TASK [configure device with config] ********************************************
changed: [rtr1]
changed: [rtr2]

PLAY RECAP *********************************************************************
rtr1                       : ok=1    changed=1    unreachable=0    failed=0    skipped=0    rescued=0    ignored=0
rtr2                       : ok=1    changed=1    unreachable=0    failed=0    skipped=0    rescued=0    ignored=0
Paso 6 - Verificar la configuración
Use the command show ip int br to verify the IP addresses have been confirmed on the network devices.
[student@ansible network-workshop]$ ssh rtr1

rtr1#show ip int br | include Loopback100
Loopback100            192.168.100.1   YES manual up                    up
Consejos a recordar
- The Jinja2 template lookup plugin can allow us to template out a device configuration.
- The
config(e.g.cisco.ios.config,arista.eos.config) and cli_config modules can source a jinja2 template file, and push directly to a device. If you want to just render a configuration locally on the control node, use the template module. - Variables are mostly commonly stored in
group_varsandhost_vars. This short example only used group_vars.
Solución
The finished Ansible Playbook is provided here for an answer key: config.yml.
The provided Ansible Jinja2 template is provided here: template.j2.
Completado
¡Felicidades, has completado este ejercicio de laboratorio!
Click here to return to the Ansible Network Automation Workshop